How to install Windows 7 on an Acer laptop. How to restore the Windows operating system on an Acer Aspire one laptop
Most laptop users are faced with situations where they need to reinstall the operating system, often while keeping the licensed Windows. This publication discusses several methods of how to reinstall Windows 7 on a laptop, and also talks about the nuances of the process of installing the OS on laptops from different manufacturers.
Restoring the system using a Windows 7 backup
Most mobile computer manufacturers create backup storage for 7 distributions or any other OS. Reinstalling Windows 7 on a laptop from these memory areas is done using built-in utilities.
To start the reinstallation, reboot your laptop and press:
- for Windows on an HP laptop on F11;
- on an ASUS laptop on F9, boot immediately when you start;
- for Windows 7 on a Lenovo laptop on F11;
- On an Acer laptop, the key combination Alt + F10 is suitable;
- for Windows 7 on a SAMSUNG laptop on F4.
After pressing the desired key, instead of the standard Windows 7 boot, the OS recovery interface will open:
After downloading the program, follow the instructions to restore Windows.
But remember that all settings will be reset, and data from the previous copy of the system may be deleted.
Reinstalling from disk
When reinstalling from a disk, remember that to restore the license you need to use a distribution kit with exactly the same OS as was installed previously. You can find out the version of the installed system on a sticker, which is usually located on the back of the laptop. By the way, the license key for your copy of Windows is also located there.

Remember that when you reinstall, a new operating system is deployed from the disk, and to avoid problems in the future, you should delete the data from the previous Windows.
This is achieved by formatting the system partition, so take care in advance to transfer all the necessary data from the selected hard drive volume to install Windows. It is not advisable to transfer installed programs, since this will lose connection with the registry, and many of them may not start. Don't be lazy, install them again after replacing the OS.
The installation disk distribution does not include drivers for all laptops, so download the drivers for your device in advance from the manufacturer’s official resource. If this is not done, then after installation there is a high probability of the following problems occurring:
- The network card does not work;
- Wi-Fi does not work;
- Applications do not launch.
If you reinstalled the OS without this, then to troubleshoot network equipment you will have to download the driver distribution using another computer and transfer them using removable media, so before reinstalling, do not forget to play it safe and download drivers for the network card and Wi-Fi module.
To begin the installation process, insert the disc into the drive and restart your laptop. After your computer starts, open the boot menu and select boot from DVD.

This dialog is called up on most laptops using the F12 key, and on HP devices the combination F9 + Esc is used.
Often on older computers this function is missing, so you will need to open the BIOS and edit the boot priority yourself. To go to the BIOS on laptops, manufacturers use the following keys:
- Acer, Asus, Samsung, Lenovo - F2;
- hp - F10 + Esc .
If the brand of your device is not in this list, then find out the actual key for it on the window that loads when you turn on the PC.
The BIOS interface from different manufacturers is not similar in appearance, but the sequence of actions for changing the boot priority is almost identical. Navigation through the windows of a running BIOS of all versions is carried out using the arrows on the keyboard and the Enter, Esc, +, - keys.
Sequence of actions for BIOS AMI:

Sequence of action for BIOS Phoenix-Award:

Windows installation
After making a change to the BIOS and rebooting, a dialog will appear with the message: “Press any key to boot from CD or DVD.”

Further installation of Windows 7 is not difficult, do the following:
- Press any keyboard key.
- Wait until the file unpacker completes; a screen with the entry “Windows is loading files...” is displayed.

- In the dialogue " Windows installation» Specify the language and click on the Next button.

- In the window that appears, click on the large Install button.

- Select the version of the system to install that has a license code. You will need to enter it after reinstalling Windows 7.

- Agree to the licensing terms.

- Select installation method - " Full installation».

- Select the drive volume on which you are going to install the OS and prepare it by clicking on the item " Disk setup».
 There are situations when a reserved drive partition is present in the list; be sure to select another volume.
  If you have disks with a capacity of more than 250 GB, it is worth splitting them into several. Typically, a separate partition of up to 100 GB in size is allocated for system installation.
- Format the selected drive partition. A warning will appear that all information on it will be deleted. Confirm your consent, because you have previously saved all the necessary data. Wait for the installation to complete and click on Next.

- Wait for the installation process to complete, on average it lasts from fifteen to twenty-five minutes, the duration depends on the configuration of the laptop.

- Fill in the fields provided with your username and PC name.

- Protect your account with a password, or you can skip this step.

- Enter the key copied from the sticker on your laptop.

- Select your security options.

- Set the date and time.

- If you have a network connection, specify the connection type.

Reinstalled Windows is ready to go. If you changed the boot priorities in the BIOS, return the hard drive to first place in the list, otherwise the computer will constantly try to start from the DVD.
Reinstallation from a flash drive
Many compact PCs, such as netbooks, do not have a DVD drive. Therefore, the question arises of how to properly reinstall Windows 7 on them. The answer is simple - use removable media.
To reinstall from a flash drive, you need to download the Windows 7 distribution image in ISO format and write it to this media using a special utility. Remember, in order to properly reinstall a licensed Windows system, you need to download a container with the same OS version. The flash drive itself must have a capacity of at least four gigabytes.
Burning Windows to media using the most popular utility among analogues Ultra ISO is performed according to the following algorithm:

The installation flash drive is ready, but to start the installation, you need to select " USB-HDD" How to set up the BIOS is described above, all steps are similar, you just need to select another entry from the available list. Further installation is no different from installing Windows 7 from DVD.
Often after reinstalling Windows does not work. To solve this problem, take another OS distribution and repeat the installation process. In addition, many users ignore the need to format the partition and reinstall the seven on a disk that already has an installed copy of the system. Avoid this as it can also cause problems.
Conclusion
This article covered reinstalling Windows 7 in several ways. If there is no backup copy, then this procedure should be carried out from a disk on which exactly the same version of the OS is recorded. Some laptops do not have a CD-ROM, so reinstallation can only be done using external media, for example, a flash drive.
Video on the topic
Relatives bought a computer with Windows 8 pre-installed. So far no one has found it more convenient than Windows 7, both experienced and unsophisticated people among my friends. We tried to install the seven ourselves, but very soon gave up and asked to reinstall it.
 First, let's see if there will be any problems with finding drivers for seven. Everything is fine with this - on the driver manufacturer’s website as .
We insert the distribution disk and try to press F8 while loading. Something doesn't help.
You'll have to look at the bios. Ctrl+Alt+Del and F2 at the start of loading.
Boot priority is the penultimate item in the top menu. In the explanations on the right they write that you can change the priority of devices for loading. Select DVD and press F6 to raise it to first place.
We try to reboot.. again it didn’t help... eight is loading.
I remember: when shuffling devices, the first item was something related to the abbreviation UEFI, which was unfamiliar to me. We return to the BIOS, yeah... there is an option to select instant boot instead of UEFI. We try to select it, save and exit. Hooray! Loading has begun.
Everything is as usual, we reached the disk selection screen, where there are 3 invisible small service partitions no larger than a gigabyte in size, then only the partition on which the system is installed, and another service partition.
We try to select the largest section - fig! Installation on this disk is not possible. The selected disk has a GPT partition style.
Well, to hell with it, we don’t like the style of the sections, so we’ll demolish it. There is no need for service partitions, we have all the drivers. It's not my rules to doubt. There is a feeling that it will work - I have to do it as I think. If something suddenly goes wrong, then we’ll look into it in more detail. The Internet and a work computer are at hand, so there will be no unsolvable problems.
Select “Disk Settings” - select the disks sequentially, starting with the last one and click “delete” each time.  After which there was one unallocated area of 1 terabyte. Click create and edit the size - set it to about 200 gigabytes (I don’t like it when everything is in a heap on one disk, I prefer to keep the system and programs that require installation directly on the disk with the system, so that if the system is reinstalled, I can simply format one disk and put it on a blank disk All over again).
Select the remaining unallocated area again and create another partition, this time for the entire remaining space.
Select both drives in sequence and click “format”. We select a 200 GB disk - the “Next” button is active this time - the warning message has disappeared this time - click “next” - and wait until it is installed.
All that remains is to install all the drivers. It makes sense to first install the IntelChipset Driver, then the IntelVGA Driver, restart the computer and then install everything else. All three VGA drivers are needed, because... There are two video cards in the beech, one works for everyday tasks, which is intel hd graphics, and nvidia should be activated only for graphics-intensive tasks - in games and graphics editors. I also prefer to activate it in the browser too, otherwise there are slowdowns, especially noticeable on flash.
With UEFI BIOS! Hello friends, a friend of mine bought an Acer Aspire ES1-511 laptop without an operating system. The laptop is inexpensive and is not designed for games, but only for work.
The BIOS of the Acer ES1-511 laptop is common for all Acer laptops with UEFI elements with all the ensuing consequences, and my friend could not install Windows 7 on it. Having spent two weekends on this matter, on Monday he called me and asked me to install the operating system for him.

A friend of mine lives outside the city and it took a long time to get there, and then I was almost eaten by his dog.

Then we take our laptop out of the box,

We connect our bootable USB flash drive to it. We connect the flash drive to a USB 2.0 port, since Windows 7 does not support USB 3.0 (ports are usually colored blue).


Turn on the laptop and press F2, enter the BIOS and immediately go to the Main tab.

Main Tab
We enable the ability to call the laptop boot menu when booting using the key F12. Set the F12 Boot Menu option to Enabled, then go to the tab Boot.

Boot tab
Naturally, this tab does not contain our Kingston installation flash drive, but it would be there if we made it a special UEFI flash drive. Set the Boot Mode option to Legacy

We agree with the warning. OK


Click F10, by doing this we save the changes made to the UEFI BIOS parameters and reboot.

Click when loading F12(call the laptop boot menu)

And please, our Kingston bootable flash drive is present in Boot Menu, select it using the arrows on the keyboard and press Enter.

Note: If for some reason you are unable to open the laptop boot menu using the key F12, then enter the UEFI BIOS on the Boot tab and using the keys F6(raise up) place the flash drive in the first position, then press F10(save the settings and reboot),

As I already noted, after successfully installing Windows 7 on an Acer laptop with UEFI BIOS, we will face problems with drivers and we will successfully solve them.
What to do if Windows 8.1 is already installed on the Acer Aspire ES1-511 laptop, how to install it thenWindows 7 on this laptop
When the message “Press any key to boot from CD or DVD” appears on the screen, press any key on the keyboard, thereby agreeing to boot from the installation disk.


Install.

We accept the terms of the agreement. Select the full installation.

Friends, to install Windows 7, you need to delete all existing partitions on your GPT hard drive and install Windows 7 directly into the unallocated space. Click on the “Disk Setup” button and delete all existing partitions,

then install Windows 7 directly into the unallocated space.
Windows 7 automatically converts the hard drive to the MBR standard during installation. Click on the Next button.

If the Next button is inactive or an error occurs (which is unlikely), then we call the command line, press Shift + F10 on the keyboard and convert our hard drive to the MBR standard in the command line, all partitions and data on the disk will also be deleted.
Press Shift + F10 on the keyboard. On the command line, enter the commands sequentially:
diskpartseldis 0
clean
convert mbr
exit
exit

Click Update.


Which should end well.

After installing the Windows 7 operating system, go to Disk Management, right-click on our disk and select Properties,


Friends, if you are a computer enthusiast, you must know.
I want to tell you how Windows 7 was installed on an Acer Aspire 7600U monoblock. A little background. The Acer Aspire 7600U all-in-one PC had the Windows 8 operating system pre-installed. Soon there was an update to Windows 8.1 and the all-in-one PC worked on it for about 2 years. But recently, the all-in-one PC began to slow down periodically. The user clicks on the “This PC” shortcut with the mouse several times, but there is no response in response, then several windows open at once. It feels like the computer falls asleep and wakes up reluctantly. Although if you click on a folder that is on the desktop, it opens immediately. Reinstalling Windows 8.1 with drivers from the official website did not lead to anything. Almost immediately similar brake symptoms appeared. And this is with such a strong hardware! i7 2.4Gh quad-core processor with eight processing threads, 8Gb of RAM, RAID on a 32Gb SSD is used.
Using the DPC Latency Checker program, I came to the conclusion that the drivers and the operating system are slightly incompatible. Since the system responsiveness was constantly in the yellow zone in the region of 1000 - 1400 milliseconds? Disabling all kinds of devices (Wi-Fi, TV tuner) did not help. For the experiment, I installed Windows 8.1 on another computer and, using the DPC Latency Checker program, measured the responsiveness, it was also in the region of 900-1500 milliseconds. Then I installed Windows 7 on another hard drive, with an IDE interface, and the measured responsiveness was in the region of 65-100 milliseconds on the same hardware! As they say, feel the difference, 15 times!
Conclusion: the drivers and the operating system are still somewhat incompatible. It was decided that installing Windows 7 64bit on an Acer Aspire 7600U monoblock would help. Without thinking twice, I copied all the user data to a flash drive (fortunately there weren’t many of them, the candy bar was used for work!) and began installing Windows 7 from the flash drive.
And the dancing with the tambourine began! When changing the settings in the BIOS, the ride array collapsed. While it became possible to boot from the installation flash drive, I went through a bunch of settings in the BIOS. Further, during installation, the HDD does not see, but only the 32Gb SSD. Then, when installing on a HDD, it complains that the disk partition is GPT and installation on it is not possible, although Windows 7 64 bit should be installed if we have a BIOS with UEFI support. I settled on the option of HDD disk partitioning in MBR, since GPT partitioning is needed for disks larger than 3 TB, in our case it is terabyte. And in the BIOS settings we disable UEFI boot.
After partitioning the disk, Windows 7 was installed on an Acer Aspire 7600U monoblock, but not without issues. Error 0x80300024 popped up when starting to copy files. On the Internet they say about the error that it is necessary to change the boot order of devices. And so that the flash drive does not come first, but I need to boot from it. The solution has been found! In the boot menu, the HDD was first, then the disk drive and then the flash drive. And at the boot stage, press F12 and select the flash drive in the boot menu.
After installing Windows 7 64bit, I used Windows 8.1 drivers downloaded from the official website (the network card will not work with Windows drivers, you need to use native ones from the official website). I launched the DPC Latency Checker program and, lo and behold, the system’s responsiveness became around 65-120 milliseconds. We come to the conclusion that Windows 7 is still a very successful operating system.
For the experiment, I installed Windows 10 on my home computer and there, too, the system responsiveness is like 8.1 in the yellow zone of 2000 - 2600 milliseconds, and on the seven the responsiveness is within 140-240 milliseconds, on the same hardware.
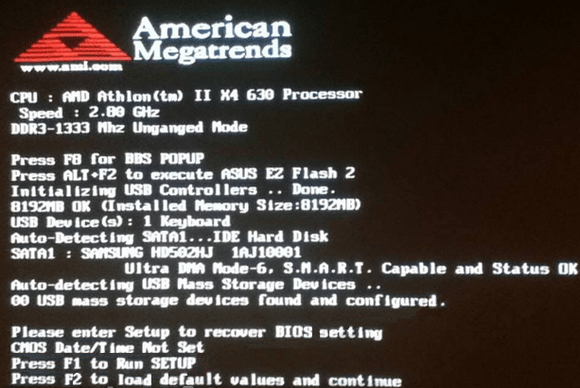
For me, the only difficulty was setting up the BIOS to boot from a flash drive (searching on the Internet did not give any answers), so below I will show what settings I had in the BIOS (maybe it will be useful for someone) to boot and install from a flash drive. How to redesign a disk with the loss of all data on it via the command line, there is a lot of this information on the Internet. Below is a photo of the BIOS settings.
Boot settings for correct installation Boot order for SSD and HDD drivesInstalling Windows 7 on an Acer Aspire 7600U monoblock showed a performance rating of 5.9, and this is due to the fact that the HDD rotates at 5400 rpm.
IN Windows 7 RC There is an additional function, the same as Windows XP mode (XPM). Although Windows 7 was very stable for initial use, many users did not dare to install it on laptops. But with Windows 7 RC, now you can install Windows 7 to your main machines, including netbooks. Installing Windows 7 on a netbook is not as easy as installing on laptops or desktops that come with a built-in DVD drive. Since we cannot use DVD media to install on Netbook, we must use a USB disk (flash drive) to install Windows 7 on Acer Aspire One Netbook.
This guide is created exclusively for Aspire One Netbook users who love being able to install a brand new and clean Windows 7 on their Acer Aspire One .
Requirements:
1.Windows 7 DVD or ISO
2.USB drive with 2.5+GB (4GB recommended)
3.Windows 7 on the machine to create a bootable USB drive.
4.Finally, your Acer Aspire One with a 100% charged battery or connected to a power source.
Procedure: Install Windows 7 on Acer Aspire One (Netbook)
1.First of all, we must create Bootable USB drive with Windows 7 To do this, insert the flash drive into the system unit, and then copy or move all your content (if any) from the DVD drive.
2.Next, open a command prompt with administrator rights. You can use any of the given methods below to open a Command Prompt with Administrator rights (also known as an elevated Command Prompt).
* Type CMD in the Start menu and press Ctrl + Shift + Enter.
* Start Menu > All Programs > Accessories, right-click Command Prompt and select Run as administrator.
3.You should know a little about USB. Enter the following commands in the command prompt:
Type DISKPART and press enter to see the message as shown in the picture below.
Enter the following type of List Disk command and write down the disk number (for example: Disk 1) this is your USB flash disk. In the screenshot below, my Flash disk is not disk 1.
4. The following type of commands need to be entered one by one. Here I don't think your disk is not "Disk 1". If you have disk 2 as your USB flash drive, then use disk 2. Go back to the previous step to confirm this.
Below are the commands that you must enter and execute one by one:
SELECT DISK 1
CREATE PARTITION PRIMARY
SELECT PARTITION 1
FORMAT FS=NTFS
(The formatting process may take a few seconds)
Don't close the command prompt window, because in the next step, we have to run one more command. Just keep it to a minimum.
5. Your next step is to insert the Windows7 DVD into the optical drive and check the DVD drive letter (Double click the computer icon to know the DVD drive letter). For the purpose of this guide, I will assume that your DVD drive is assigned the letter "D" and your USB drive is assigned the letter "H" (open my computer for more details on this).
In case you don't have Windows 7 DVD and you only have an ISO file, you need to use a free software called Virtual Clone Drive. Download Virtual Clone Drive and then use Virtual Clone Drive, just like you would use DVD for DVD editing Windows 7 ISO: You can also use your WinRAR software to extract Windows 7 ISO file to your desktop.
6.Minimize the Command Prompt as much as possible in step 4. Now enter the following command:
Where “H” is the letter of your USB drive. After entering the command, you will see the message below.
8.Copy all the contents of Windows 7 DVD to USB flash drive.
9. So now you have Bootable Windows 7 USB drive. Reboot and then press F12 to enter BIOS. Select the USB drive as the boot drive and press enter. Everything will begin after the reboot installing Windows 7 on your Acer Aspire One Netbook.
10. Your Windows 7 The installation procedure should begin now.
11. Installing Windows 7 is very easy, very similar to installing Vista. Simply follow the onscreen procedure to complete the installation process.
D: CD BOOT and press enter. Where "D" is your DVD letter.
CD BOOT and press enter to see the message below.
7. Enter another command below to update the USB drive with Bootmgr compatible code.
It might be useful to read:
- How to restore the Windows operating system on an Acer Aspire one laptop;
- The computer froze with the error “Windows updates could not be configured” - what should I do?;
- How to find a free Wi-Fi channel and change the channel on the router?;
- Bible on Android How to download the Bible to your smartphone;
- How to completely remove yourself from classmates and is it possible to recover?;
- Free diaper reset for Epson L100, L200, L800;
- Review of modern electronic storage media;
- Data backup programs;