How to play games on your phone. We run any PC games on our smartphone! How to run PUBG Mobile on Windows or Mac using BlueStacks emulator
REPOSTS
Today in the section Questions and answers I am answering a question from one of the blog subscribers "". This is a simple matter and does not cause any particular difficulties. There may be some problems with the necessary equipment.
What you need to play VR games on your phone
Let's put the most logical thing first - the phone. Because it’s quite difficult to launch a mobile virtual reality game without a phone =) But it’s not just any phone that will do, but one that has the appropriate parameters. Previously, I already wrote a detailed article about. The article explains everything in as much detail as possible, so I advise you to use it. But, if you are short on time and you are confident in your abilities, then below I will give a list of requirements for a phone for virtual reality.
This slideshow requires JavaScript.
There’s no need to worry too much about choosing a helmet; as for me, they don’t differ much, other than their appearance. So feel free to choose something from a less popular one, like VR Box, or some clone if you need a cheaper option. Unless you only have a Samsung Galaxy S6 or higher phone - then it’s worth taking it.
Again, the list of devices can end here, or it can continue. For example, to be able to control a smartphone after installing it in a helmet, so as not to jerk it back and forth every time. Or to control some games, you will need a joystick for virtual reality. You can get by with some Chinese gadget with a minimum of functions, or you can buy something cooler for several thousand rubles. The main condition is wireless communication via Bluetooth.

A simple Chinese joystick
Headphones will be a good help in immersing yourself in virtual reality, but they are, perhaps, in every modern home. But no, it’s not necessary, but any with a 3.5 jack will do, if there’s a jack in your phone (the latest iPhone doesn’t seem to have a jack).
Virtual Reality Phone Requirements
The most important thing is that the phone must have a gyroscope. Without him, unfortunately, there is nowhere. The accelerometer is also suitable, but for a very small number of games, and even then, control becomes almost impossible - everything twitches like a seizure puppet.
The Android operating system version must be at least 4.0. For iPhone and Windows Mobile versions no lower than 5.1 and 8.1, respectively. But this is not such a problem, since a gyroscope is usually not installed in old phones, and in very advanced cases, there are firmwares.
Phone display from 3.5 to 6 inches. The bigger, the better. The same goes for screen resolution. The higher it is, the better. There is nothing worse than playing games on a phone with poor resolution. Take a magnifying glass and point it at the screen, leaning it against your eye. This is approximately how you will see the screen. When there are few pixels per inch, then all these pixels are visible, borders and transitions are visible. It's unpleasant and the graphics are terrible.
Everything has been purchased, what next?
So, we have purchased everything we need, now we need to download a virtual reality game for our phone. The easiest way to do this is in two ways. Go to your phone's application store (Google Play, AppStore or Windows Store) and search there. By an already known game or by entering the abbreviation VR into the search bar. Most virtual reality games for phones contain it in the title.
The second way is even simpler - go to the directory on my blog. Yes, there are not very many of them there yet, but little by little it is filled with fresh reviews of VR games for phones. The catalog immediately provides basic information on the game, and by clicking on the title you can go to a page with explanatory information and a download link.
Games are pumped up, how to play VR games on your phone?
And then it’s a matter of technology. You launch the game on your phone, view the splash screen, select start or something else in the phone menu, if required, and then insert the phone into the helmet. It is usually easy to insert, but it depends on the specific helmet model. Usually you need to unfasten the front cover and insert the phone into the latches. Then fasten the helmet lid back. And put the helmet on your head.
If you have a joystick for virtual reality, then you can launch the game and switch between them without removing or disconnecting the phone from the helmet. If not, then each time you need to do the whole procedure again - take it off, unfasten it, switch the game, fasten it, put it on.
There are two types of controls in VR games for phones - sensors and joystick. Most games choose the sensor route, since not everyone has a joystick, and mobile virtual reality is still a budget virtual reality. Sensor control = head tilt. Joystick controls vary depending on the game.
conclusions
So, as you can see, there is nothing difficult about the question of how to play VR games on your phone. First you need to make sure that the phone is suitable, then buy a helmet, download games and you can enjoy virtual reality content. You can ask your questions through a special form on.
The concept of streaming a PC game to a mobile device is nothing new. Nvidia's Grid Service, for example, allows players to access PC games via consoles and tablets, while Limelight's Game Streaming opens the door to Android devices, provided you have a GameStream-compatible computer.
Remotr goes further and allows you to play almost any computer games on any Android device. The app is free and works well, but with some caveats.
The service consists of a Windows client and an Android application (an iPhone version is in development). I tested the application on a fairly powerful system with a Core i7 and a Nexus 7 Google tablet.
What does Remotr do? In a nutshell, it mirrors your computer screen on your mobile device while the app provides a front-end interface for selecting the game you want to play.
Equally important, the app shows on-screen controls to simulate the use of the controller, keyboard and/or mouse you use on your computer.
To get started, you simply download and install the Windows client (which is compatible with Windows 7 and later), and then install Remotr on your Android device. You will need to create an account, then log in from both applications. Therefore, Remotr can work not only over a local Wi-Fi network, but also over a cellular network (in this case, Internet traffic will be consumed).
After completing these steps, you should see that your computer is identified in the mobile application. Click on it to open a panel tiled with games you have installed, then click on any of them to launch the game.
And here's what's confusing, as it's not immediately clear how to set up or even control the game. For example, although I was able to run Tomb Raider, I had no idea how to recreate my desktop keyboard and mouse buttons. And at the moment, the developers do not offer any detailed documentation.
After some fiddling, however (starting with clicking the magic wand icon), I was able to display the equivalents of the WASD keys and mouse buttons. And at least he was able to move Lara Croft around the playing field. Remotr has built-in control profiles for Counter-Strike and Team Fortress, but it would be great if there were more profiles.

Ultimately, I don't think I'll play this way, as the controls, even when mapped correctly, are very awkward. And there are a lot of great native Android games, and even Android ports of board games, so for the most part I don't see the point of it all.
However, Remotr works as promised, and in Tomb Raider at least everything went surprisingly smoothly. If you have even a passing interest in playing board games on your phone or tablet, Remotr is certainly worth a try.
The Chinese company Tencent has begun testing mobile versions of PlayerUnknown's Battlegrounds. PUBG Mobile: Army Attack is simpler than the original, but PUBG Mobile: Battlefield almost repeats the computer game. Applications for iOS and Android cannot be downloaded just like that if you are not in China - but we have compiled management.
Both platforms require a QQ account, Tencent's social network. It can be done on the English page. You will be asked to confirm your registration using your phone, but there will be no problems: you can use a SIM card from any country.
Playing on Android is very easy, since the system supports third-party downloads. PUBG Mobile: Army Attack and Battlefield apk files are available via the links. You need to allow the installation of third-party applications (usually done in the security settings) and copy the file to the device. After that, launch the application, log into your QQ account - and you can play.
On iOS you will have to tinker. The system does not allow downloading applications from outside, and mobile versions of PUBG are only available for accounts with the Chinese App Store. The easiest way would be to change the account region, but then you will have problems with current programs. They will not be able to update and you will not be able to re-download purchased applications. There is only one way out of this situation: change the region back and forth when you want to install an important update or restore a purchase.
In our case, it is better to make a separate account. It can be registered both on the Apple website and on an iOS device. You won't be asked to specify your region when registering; you'll need to do that in your App Store settings. The system will prompt you to select a payment method (check the box next to “absent”) and enter the address (any real street in China and your phone number will do).
After this, you need to open the App Store, and iOS will automatically transfer you from your usual region to Chinese. When you request PUBG, you will be given two games from Tencent: in the icon of the “hardcore” version the man is on the left, in the picture of the arcade shooter - on the right.
/https://hb.bizmrg.com/cybersportru-media/26/26c88e457b2284ce0a42ead6354ecd72.jpg)
Mobile PUBG only has Chinese, but we will help you understand the basics. We took screenshots from the arcade version, as it is a little more difficult to set up.
On the first screen you need to log in through your QQ account using the button with the corresponding letters. You must enter your account number in the upper field, and your password in the lower field. After that, we create a hero: fortunately, there is no text here. The character editor is only available in PUBG Mobile: Battlefield.
/https://hb.bizmrg.com/cybersportru-media/6d/6d867ab75956f16920ea03e24cf124c5.jpg)
/https://hb.bizmrg.com/cybersportru-media/2d/2d15621f02b30b981c1d4d4429cf62ff.jpg)
Matchmaking is available via the top banner on the right. As on the main platforms, you can play alone, together or in a squad of up to four people. Add friends to QQ to create a group with them. Click on the large inscription on the bottom right - and you are in the match. In the Battlefield version, you select the battle type in the slider on the left and start using the key above it. If you want to play with random Chinese, you can check the box below the list of modes.
/https://hb.bizmrg.com/cybersportru-media/74/74100aa5a89aa6db426be7ddf423a125.jpg)
/https://hb.bizmrg.com/cybersportru-media/83/836d576febec325b69d61d272c24a1e2.jpg)
The controls are familiar to mobile shooters - you run with a virtual stick, swipe across the screen and shoot with a button. The key with the eye icon gives you a free view: you need to hold it with your finger and move it in a circle.
/https://hb.bizmrg.com/cybersportru-media/13/13f0af4ee221efa30de30fb9e8cfe696.jpg)
Mobile versions of PUBG already work stably, and in case of problems, reconnection is provided. The only negative is that the ping in Moscow ranges from 300 to 400 ms. We'd still recommend giving it a try and seeing if you come back when Tencent adds servers in the West. If after the test you like the idea of a “battle royale” on your phone, then you can install analogues. NetEase Games' Rules of Survival is more popular on iOS, while Garena's Free Fire Battlegrounds is more popular on Android.
Using only a local network, without being able to connect to the Internet, in this news we will look at several options for how this can be done. The first option will be simpler, but will require an active connection to a Wi-Fi router, and most importantly, the router may not be connected directly to the Internet, in our case, it will simply work as a means of transmitting data from one phone to to another, or to a friend who plays on a tablet. These methods are completely free.
The second method will be a little more complicated, but it does not require you to have a Wi-Fi router; the connection between devices will occur through the created mobile point, which can be any Android phone.
Wi-Fi Router. Method number 1
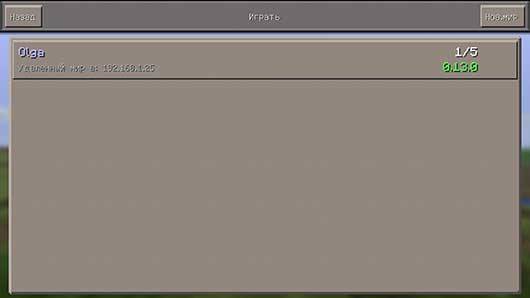
As you understand from the text above, we will need a Wi-Fi router, thanks to which you will transfer information between devices. Just connect all devices to one Wi-Fi, then from any of the devices, preferably the most powerful one available, enter the game.After that, click on the "Play" button and go to the game world creation menu. Choose the settings based on your needs, if you just want to have fun, then choose the creative mode, if you want teamwork, definitely choose the survival mode.


After you create a game world, ask your other friends to go into the game and go to the game world selection menu, where after a few seconds they can see the local server you created and start playing Minecraft PE over the local network.

As you can see, this method of playing over a local network in Minecraft PE is very simple and only requires a Wi-Fi router, even if there is no Internet cable connected to it, you can still play. This method is perfect if you are in a place where there is no Internet, but there is electricity.
The phone is like a Wi-Fi router. Method number 2
This method is somewhat different from the previous one in that you do not need a Wi-Fi router, since one of your Android devices will be configured to transmit mobile data and essentially become a router itself.First, we need to go to the settings of the Androdi-based phone and find the “Modem and access point” menu item there; on different versions of Android OS, it may be called slightly differently.

After that, click on it and you will be taken to a menu where you will see the item "Mobile hotspot"

We click on this inscription and we will see a description of this method of creating a Wi-Fi router to which up to 10 other devices can subsequently connect.

After that, find the “Settings” button on the screen; in my case, it is located in the upper right corner of the screen, you can have it anywhere, even at the very bottom.

Going to the mobile hotspot settings, you will be asked to select the name of the hotspot, I called it “Minecraft PE” to make it easier to find later. After entering the name, you must enter a password, which must be at least 8 characters, after entering these parameters, click "Save".


Next, turn on the access point using the horizontal slider, after which a warning will appear on the screen that the Wi-Fi module of your device will switch to router mode and will not be able to connect to other routers, click “Ok”.

After this, you can safely enter the game and create a game world in Minecraft PE. After the creation of the world, you need to connect other devices to the access point you created, this is done in the same way as the process you use to connect to a regular Wi-Fi router. In the list of available networks, select the one you created and enter the password.


After which, all players can safely launch the Minecraft PE game and enjoy the game over a local network, where only your friends will be and where no one can interfere with your joint gameplay.


As you can see, this method of playing over a local network in Pocket Edition is somewhat more complicated than the previous one, but it allows you to play anywhere, be it a street, a school classroom or a deep forest.

The only limitation that such a game imposes is that the same version of the game must be installed on all devices (phones, tablets), since if you create a game in version 0.13.1 people with earlier ones (0.13.0 or 0.12.3) or later (0.14.1 or 0.14.0) versions will not be able to connect to you, keep this in mind!
Play via Bluetooth. Method number 3
This method will talk about playing over a local network without using Wi-Fi at all. This method has several advantages over others, but at the same time it has significant disadvantages, but let's talk about everything in order. In this method you will learn how to play Minecraft PE via Bluetooth. To do this, you will need to create a Bluetooth modem from your device so that other devices can connect to it.The first thing to start with is to turn on Bluetooth and make it visible to other devices; to do this, check the box next to the name of your device; this menu appears automatically after turning on Bluetooth. After you check the box, a timer will start counting down, which shows how long your device will still be visible to everyone else.


Then go to the settings and find the “Modem and access point” menu item, go into it, you can see an example of this item in the screenshot below, but your name may be slightly different or located in a different location.

After going to the “Modem and access point” menu, find the “Bluetooth modem” item and turn it on, this is required so that several phones or tablets can connect to your device at once via a Bluetooth network.

Now you need to go into the Minecraft PE game and simply create a world, after which everyone else can safely turn on Bluetooth on their devices, find your device in the list and calmly connect to you.


Now let's talk about the disadvantages of this method, firstly, it imposes a restriction on playing on different versions of the game, all players must have the same version of the game. Another important disadvantage of this method is that the bandwidth of the Bluetooth channel is much lower than that of Wi-Fi, so the more players connect to you, the more glitchy the game will be. I would also like to note that when using this method, you must be at a fairly close distance with other players, since the signal strength compared to Wi-Fi is much lower and the closer the devices are, the more stable the gameplay will be.
The advantages of this method are lower power consumption, high mobility thanks to which you can play anywhere and, of course, ease of use.
It might be useful to read:
- Review of a hybrid tablet from ASUS - Transformer Book T300 Chi What games does the asus t300 chi play?;
- How to delete a Facebook page permanently from an iPhone How to delete Facebook forever from an Android phone;
- Convert GPT to MBR without data loss using Paragon Hard Disk Manager;
- We run any PC games on our smartphone!;
- The best programs for reading books on your phone;
- Backing up iPhone to iCloud and iTunes;
- Which operating system to choose for your computer - comparison and selection of the best;
- Learning to use the Hamachi program;