We bring a bricked smartphone back to life. How to unlock bootloader on Android smartphone
Hi all! Today we will look at the simplest and most convenient methods for flashing your smartphone (or tablet).
The article is divided into the following sections:
Why is flashing needed?
Everything here is clear: either you have problems with your device, or you want something new, but the developers have stopped introducing new versions of the OS.
What are the firmware methods?
There are only two of them, but each in turn is divided into several more.
- Firmware via phone.
- Firmware using a computer.
Now we will look at several methods of flashing firmware using a PC.
Necessary preparation before the stitching process
All this needs to be done so that there are no disruptions to the installation of the new OS.
- Fully charge your device and your computer;
- Make a backup of your old OS;
- Check if the USB cable is working properly.
Making a backup
The example shows Android 5.0 OS, but all the steps described below are almost the same in any version. Therefore, just carefully review these instructions.
- Go to your device's settings.
 2. Select “System Information” and the “Memory” section.
  3. Now click on the “Backup” button.
 4. Now everything is simple: make a backup by selecting the items you need to save, as shown in the pictures.


5. That's it, the backup is ready. You can copy it to another device or use it. 

Firmware using FASTBOOT
Now that all possible security measures have been taken, you can proceed with the firmware.
First, download Fastboot to your computer. Make the program boot folder in the root directory of drive C. For example, C:\fastboot. In this case, it will be easier for you to register the location of the firmware in the future.

The installation file can be downloaded from the link (Android debugging utility).
First let's unlock Bootloader
Bootloader is a program outside the Android system that provides access to the kernel of the device. It can be compared to the BIOS on a computer.
By unlocking it, we will get root rights - open access to the system. On devices from different manufacturers this is done using different software. But there is only one algorithm, and it’s like this:
- You download and install the unlocking program in accordance with the device manufacturer.
- Then connect your smartphone via USB cable in debugging mode.
- Open the downloaded program, select your device and click “Unlock”.
Unlock example
Here is an example of unlocking a device manufactured by HTC.
1. Download and install HTC Bootloader Unlock.
2. Then connect the device to the computer in debug mode. Everything is quite simple here: go to the “For Developers” settings section and select “USB Debugging”.

3. Now open the downloaded program and confirm debugging (on your Android device).

4. All that remains is to simply unlock it by pressing the “Unlock” button. The process can actually be done through the Windows command line. This program only automates the unlocking process.

5. To exit HTC Bootloader Unlock, click “Finish” after completing the botloader unlocking process.

Note: There are unlocking programs for a smartphone or tablet from any manufacturer. For example:
Nexus – Nexus Root Toolkit;
Samsung - Kies;
Sony – Sony Bootloader Unlock.
If your device is from another manufacturer, just search the Internet for the appropriate utility.
Firmware process
- The first thing you need to do is connect to your computer in USB debugging mode. How exactly to do this is described a little earlier.
- First move the new firmware to the C:\fastboot directory
 3. Now put your device into fastboot mode. At the command prompt, enter the commands as shown in the screenshot.

4. In order for flashing to be successful, you need to format all directories on your device. Enter these commands in the command line one by one (after each - “Enter”):
- fastboot erase boot
- fastboot erase userdata
- fastboot erase system
- fastboot erase recovery
- fastboot erase cache
5. Now you can start flashing the firmware. From the folder with the firmware (the “fastboot” folder), run the flash-all bat file. This is what it looks like on the command line:

6. After the successful flashing process, you will see a message about this.  That's all, the device has been reflashed. And after rebooting it, you can verify this.
Reflashing using the ODIN MULTI DOWNLOADER program
1. First, you need to connect your phone to your computer using a USB cable, in debugging mode. After this, be sure to run the Odin Multi Downloader program as an administrator.

2. Then specify the location of the firmware you want to install. Here's what you need to do: click on the BOOT button and select the firmware file.


Note: if your firmware consists of several files (mostly there are three), then the path must be specified accordingly:
PDA file – in the “PDA” field;
file Phone – in the “Phone” field;
CSC file – in the “CSC” field;
3. Now you need to restart your phone. This can be done using key combinations (volume up + screen lock button + center button). As a result, the computer should recognize the phone, thereby a yellow field with the name of the COM port will appear on the screen.

4. After you click the “Start” button, the system update will begin. During this time, do not disconnect the phone from the computer. During the installation process, the smartphone will reboot several times, but you should not pay attention to this. After successful firmware installation (which takes about 10 minutes) the word “PASS” will appear on the computer screen.

After completing all the steps according to these instructions, you will be able to use any version of the Android operating system. In addition, it is worth noting that this program is suitable for flashing Android devices from any manufacturer.
Flashing an LG Android device using the KDZ UPDATER program
If you have a phone or tablet from the manufacturer LG, then it will be easier and more correct to flash it using the KDZ Updater program. How exactly to do this?
1. First download the KDZ Updater program. Actually, this is an archive that needs to be unpacked into a folder located in the root of the system drive C of your computer.


2. Add the firmware you need to the same root folder. Here is the executable file of the program, this is the only way the firmware will be visible to the program.

3. Be sure to install the action policy file called msxml.msi
4. Now enable USB debugging mode. Exactly how to do this is described above.
5. Switch the device to S/W Upgrade mode. Namely:
- turn it off;
- take out the battery;
- hold down the volume down key and insert the USB cable.
- the corresponding inscription “S/W Upgrade” will appear.
Notes:
if you were unable to enter the S/W Upgrade mode, then try doing all the steps described above without removing the battery;
also try pressing both “sound rockers” instead of the volume down key;
In order for the firmware to become possible, you need to disable the LGE Mobile USB Modem program in Device Manager.

6. Now it's time to start flashing. Run the executable program KDZ_FW_UPD.exe from the root folder on drive C as an administrator.
Note: hover over the program icon and right-click. Select "Run as administrator".

7. Set all parameters as shown in the screenshot and click “Launch software update”.

8. After some time (about 10 minutes), the firmware will be completed. Just reboot your device and enjoy the new interface.
Firmware for smartphones and tablets from Lenovo
Why did I also bring up this topic separately? Because Lenovo devices have their own nuances that create certain difficulties. However, there is also a program that compensates for them. What exactly? Ease of use and its intuitive interface.
So, let's begin.
1. You need a program for flashing SP Flash Tools. Download it.
2. To continue the firmware, you need to install drivers on the device. As a rule, they are not automatically installed upon connection. Therefore you need to do it manually.
download drivers according to your device model;
enter into the device manager on your computer (the above shows how to do this);
turn off the device;
connect the device via USB cable to the computer;
right-click on the device that appears (unidentified) and select “Install driver from a specified location”;
select driver.

3. Now launch SP Flash Tool. And specify the path to the firmware executable file (scatter file). Click on "Scatter Loading".


5. And only now connect the device to the computer.
6. Once the flashing is completed, you will be notified of this by the appearance of a bright green ring on the computer screen.

When you turn on the device, the first boot of the system will take quite a long time (5-10 minutes). That's how it should be, don't worry.
Brief summary
As you can already see, for Android devices from some manufacturers there is special software that facilitates the firmware process. So use it first.
However, there are many methods for flashing an Android device using a computer. There are so many utilities that make this process easier. But the above methods, in my humble opinion, are among the most convenient and easiest. So read, understand and go ahead!
This article provides step-by-step instructions that will help even an inexperienced user successfully unlock bootloader And install custom recovery Cyanogen Mod.
Your data is subject to deletion. If you need to save important information, we recommend making a backup. You perform all your actions at your own peril and risk. Please note that the author is not responsible for the “bricking” of the user’s smartphone.
Getting ready for installation
1. Download and install drivers. You can do this by following our link below.
2. Unpack the archive anywhere on your hard drive.
3. Turn off the phone.
4. Start the phone in fastboot mode, for which you should press “Volume -”, and while holding it, press “Power”.
5. The PC will display a message indicating that a new device has been found.
6. Go to the device manager (path: Control Panel – System – Device Manager).
7. Find an unknown device, which is usually indicated by a yellow triangle with an exclamation mark.
8. Double click on it.
9. In the window that appears, you need to click: Update driver – Search for drivers on this PC – Select drivers from the list of installed drivers – Install from disk – Select the folder where the drivers were unpacked – Check the “Search in subfolders” checkbox - complete installing drivers.
10. The device is completely ready for further manipulations.
11. Download ADB and Fastboot according to the operating system bit size: for x32/86 or x64. Unpack the archive into a folder of your choice. It is necessary that the path does not contain Russian letters (Cyrillic) and numbers. For example, I unpack a folder in d:\ADB.
12. Download custom Recovery: CWM and drop the *.img file into the same folder as ADB.
Bootloader unlock
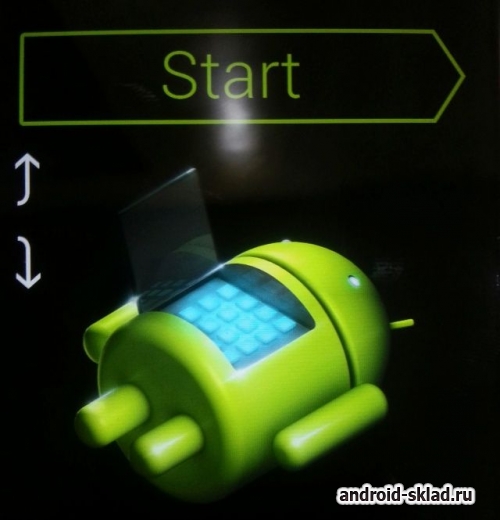
First you need to unlock Bootloader on your smartphone. To do this, you need to connect your smartphone to your PC and put it in fastboot mode. To switch to this mode, you need to turn off the phone and during shutdown, press and hold two buttons: “Volume -” and “Power”. In Fastboot mode, a green robot with an open stomach will appear on the smartphone display.
Next, you have to launch the command line: start – in the “run” line write “cmd” (without quotes) – “cmd.exe” should appear at the top - right-click “cmd.exe” - Run with administrator rights.
After that, we go to the folder in which ADB is located (in my case it is located on the path d:\ADB): first I enter “d” (no need to enter quotes) and press Enter - I enter “cd ADB” and press Enter again. The command line window now looks like this:
To unlock Bootloader you need to enter the following command:
fastboot oem unlock
We accept the unlocking by pressing the “Volume +” button and confirm the action by pressing the “power” button.
So, Bootloader is unlocked. Now we reboot into the system. The smartphone will make the necessary changes, boot up, after which you should carry out the initial setup from Google (I’m skipping a lot, since the phone will still be rebuilt). Next – launch fastboot and install custom Recovery.
Now install custom Recovery. To do this, enter the command into the command line
fastboot flash recovery ***
Need to flash Android using FastBoot, but don't know how? This article provides detailed instructions on using the FastBoot utility, how to use it, where to download it from and how to flash an Android device.
This manual will fully explain how to use FastBoot! How to use Fastboot to clean partitions, flash IMG files, reboot and many others.
If you don’t know how to install archived updates, then you need the article - how to install firmware in zip format on android with pictures.
Downloading and installing FastBoot
Before flashing Android using FastBoot, you need to download this utility and install it on the desired computer:
- You can download FastBoot from the Android developers page included platform-tools .
- Or use the program Adb Run, more precisely better, in which everything is included, and also knows how to unlock the Android pattern.
Why is ADB RUN better?
Launching the Fastboot utility
Depending on what you chose, downloaded the fastboot utility separately or selected adb run, the launch may differ!
If you downloaded Separately Fastboot
Extract the files:
- adb.exe
- AdbWinApi.dll
- AdbWinUsbApi.dll
- fastboot.exe
- libwinpthread-1.dll
Move them to the C:\ drive, Windows folder. You have successfully installed ADB and Fastboot on your computer!
After you have downloaded and installed FastBoot, open the " Command line".
Windows command line example
Example of installing ADB and Fastboot.
If you downloaded ADB RUN
If your choice fell on a proprietary program ADB RUN, then run it, type A and press Enter.

Files which needs to be flashed preferably place in the same folder with the Fastboot utility.
Instructions on how to flash Android
using FastBoot
Android firmware in Fastboot means flashing separate files for different blocks of device memory (system, data, boot).
It is very important to write commands and firmware files as they are specified!
If you have the command:
fastboot flash cache NazvaniAFiLe.img
then you need to write exactly this way, and not any other way. In other words case is important otherwise you will get - there is no such file.
Reboot Commands
Fastboot to firmware mode (bootloader)
- In order to start working with an Android device using Fastboot, you first need to put your smartphone or tablet into bootloader mode using adb:
adb reboot bootloader
- Reboot Android from firmware mode (bootloader) to the same mode:
fastboot reboot-bootloader
- Reboot Android from bootloader firmware mode to bootloader mode:
fastboot reboot-bootloader
- Reboot Android to normal mode from bootloader firmware mode:
fastboot reboot
The command "sees" your Android PC
Make it a habit before doing anything in Fastboot to check if there is a connection between your computer and Android:
- Checking whether the PC “sees” your Android:
fastboot devices
This command must be executed when the device is already in firmware mode (bootloader)
Bootloader unlock and lock commands
Google Pixel, Nexus in Fastboot
- Unlock bootloader for Pixel, Nexus:
fastboot oem unlock or fastboot flashing unlock
- Lock bootloader for Pixel, Nexus:
fastboot oem lock
Command to find out bootloader version
Shows the bootloader version number installed on Android:
fastboot getvar version-bootloader
Partition formatting commands
in Fastboot (Fastboot Erase)
Before flashing any partition in Android, you must first format it so that there are no problems in further work:
- Erases the Cache partition in Fastboot:
fastboot erase cache
- Erases the Date section (Data/UserData) in Fastboot:
fastboot erase userdata or fastbot -w
- Erases the System partition in Fastboot:
fastboot erase system
- Erases the Recovery partition in Fastboot:
fastboot erase recovery
Commands for flashing Android partitions in Fastboot
(Fastboot Flash)
After you have formatted the Android partition or partitions, you can proceed to the next step, flashing the firmware:
- Flash the system partition:
fastboot flash system imya.img
- Flash the cache partition:
fastboot flash cache imya.img
- Flash the Data section:
fastboot flash userdata imya.img
- Flash the Recovery partition:
fastboot flash recovery imya.img
Instead of imya.img You must insert the name of the file to be flashed!
- Flash all partitions (boot, recovery and system):
fastboot flashall
Command to install update.zip
Flashes an update archive on Android in the update.zip format - a ZIP archive with IMG images of various sections:
fastboot update filename.zip
For Sony devices
Checking the connection of the Sony device, if the answer is 0.3 device, then it is connected:
fastboot.exe -i 0x0fce getvar version
Unlock bootloader Sony
fastboot.exe -i 0x0fce oem unlock 0xReceived_Key
More detailed information on unlocking Bootloader Sony - How to unlock Bootloader Sony.
Waiting for Device error
If you have the following message on in the command window for a long time: waiting for device- Means:
- The driver is not installed or installed incorrectly - reinstall or install
- Android device is not in Bootloader mode - translate
- Incorrect connection to the USB port - use the rear USB 2.0 ports of the computer, do not use USB hubs
Video example of working with the Fastboot utility
For those who don't understand anything!
For those who don’t understand anything, then use the proprietary application ADB RUN, this program contains almost all the commands that are needed for FASTBOOT!
Below is an example of how ADB RUN works - how to quickly flash a Recovery file using ADB RUN in less than 5 seconds (just don’t forget to switch to bootloader mode first)!

That's all! Read more articles and instructions in the section Articles and Android Hacks. Stay with the site, it will be even more interesting!
A bootloader (Hboot) is a program that controls the kernel of your device’s operating system so that it boots normally. Moreover, this applies not only to Android, but also to other devices with an OS, such as a PC, laptop, and even an old push-button phone. In addition, it is the bootloader that gives permission to install any programs and firmware. For this reason, users are interested in factory unlocking the bootloader on an Android phone.
Hboot is activated when the device is turned on, and is an analogue of Bios in a computer. It prepares all the data for the kernel, loads it into memory, after which the system starts directly. If its integrity is damaged or something interferes, thanks to the bootloader you can get into recovery mode to clear the data, or perform a reset to factory settings. To do this, before turning on the device, hold down the power and volume down keys and do not release them until booting (in some cases, the combination of buttons may differ).
Why is the bootloader locked?
Manufacturers block for two reasons:
1. Oblige the owner to use the operating system that was developed for his device.
2. Security. Many smartphones and tablets are sold online or in retail stores. In both cases, the seller or intermediary may, at its discretion, add advertising or malicious software that should not exist. For the same reason, Xiaomi began to block the bootloader of devices released after 2016, due to numerous complaints about the presence of viruses in their firmware (which were not initially present).
Benefits of an unlocked bootloader
An unlocked bootloader opens up exactly the same possibilities for the user as on a PC, namely:
- Flash any operating system (available for your device).
- Installation of individual modules, OS kernels, applications, patches.
- Freely migrate between stock firmwares, especially if they are based on different versions of Android.
- Easily create backup copies of the current OS and/or applications, as well as restore them without using a PC.
- Use Dual-Boot and install two or more operating systems, both in internal memory and on an external SD card.
- Wider recovery options in case of unsuccessful firmware.
And this is not the entire list of possibilities after factory unlocking Android.
How to unblock
Each device has its own version of the bootloader, which means the unlocking method will differ depending on the model and manufacturer. When submitting an application, the block can be removed by the company itself (especially if you are an Android developer), but most often, this happens by hacking previously found vulnerabilities in the system.
Risks and consequences
Unauthorized unlocking of the bootloader will void your warranty service. In addition, your device becomes less secure and vulnerable to hacker attacks. An open bootloader allows you to bypass set passwords, gain access to personal information, or erase everything and install different firmware.

Conclusion
There is no need to worry too much about problems with the bootloader, especially when it comes to personal information. Found or stolen devices most often have their data erased, and rarely will anyone restore anything. An open bootloader is more needed by advanced users who know what to do with it, regularly flash something and experiment.
Leave your questions in the comments to the article below - we will try to answer.
Was the article useful to you?
Rate it and support the project!
It might be useful to read:
- Night unlimited on Tele2;
- Download the robot performer 2 program;
- Transaction Data Lock Control, Mechanism;
- How to top up your z payment wallet so as not to be without money at the right time;
- Review of portable GPS trackers: Total surveillance;
- How to unsubscribe from Aliexpress mailing list?;
- Highscreen Easy F Pro - Technical specifications Web browser is a software application for accessing and viewing information on the Internet;
- What to do if the page is unavailable?;